





Natural luminous makeup isn’t about sparkles. It’s about skin that looks healthy and hydrated. It should look quietly dimensional, like you’re well-rested in daylight, not shiny under office lights.
- What Makes a Luminous, Dewy Makeup Look Feel Natural
- Natural vs. “glittery” glow: the key differences
- How light reflection creates a radiant makeup look
- Choosing glow placements that flatter real-life lighting
- Skin Prep Basics for Glowing Skin Makeup That Lasts
- Cleansing and gentle exfoliation for a smoother texture
- Hydration layering for a fresh and glowing makeup base
- SPF that won’t dull a luminous finish makeup
- How to Customize Dewy Makeup for Oily Skin
- Balancing hydration with oil control
- Strategic powdering to keep a dewy finish to makeup
- Setting sprays that lock in a radiant skin makeup effect
- How to Get Radiant Skin Makeup on Dry or Dehydrated Skin
- Primers and Base Grips That Boost Luminosity Cosmetics
- Hydrating primers vs. illuminating primers
- Pore-blurring options that look skin-like
- Mixing drops: how to add glow without separation
- Choosing a Luminous Foundation for Every Skin Type
- What “luminous” really means on the label
- Coverage levels that keep skin looking like skin
- Shade matching tips for a natural, radiant makeup look
- Concealer Techniques That Keep the Glow (Not the Cake)
- Pinpoint concealing vs. brightening under-eyes
- Hydrating concealers for a luminous finish in makeup
- Blending tools that preserve a glowing makeup look
- How to Apply Natural Luminous Makeup Without Heavy Layers
- Sheer-to-buildable base application methods
- Where to spot-correct and where to let skin show
- Creating a dimension with thin, targeted layers
- Cream Blush and Bronzer for a Dewy Makeup Finish
- Highlighter Placement for a Soft, Radiant Makeup Look
- Best glow zones for different face shapes
- Powder vs. cream highlighter for dewy makeup
- How to avoid emphasising texture
- Eye Makeup That Complements a Fresh and Glowing Makeup Vibe
- Light-reflective lids without fallout
- Soft liner and mascara choices for a natural finish
- Brow grooming to frame a glowing skin makeup look
- Lip Options That Match Dewy Finish Makeup
- Best Dewey Makeup Products and Tools to Keep on Hand
- Complexion essentials for luminosity cosmetics
- Brushes vs. sponges vs. fingers for a luminous finish
- On-the-go touch-ups for a radiant skin makeup look
- Conclusion
The aim is simple: a glowing makeup look that stays fresh. It shouldn’t get glossy in the T-zone. You’ll achieve this with prep, thin layers, and smart placement of shine. This way, the glow hits where light naturally falls.
This guide is for everyone, no matter your skin type. You’ll learn to adjust makeup to fit your real skin on real days. It’s not about one “universal” routine.
We’ll cover everything from skin prep to touch-ups. You’ll learn about priming, base, concealing, and more. By the end, natural luminous makeup will feel easy. It will be a system for a radiant look that lasts through the day.
What Makes a Luminous, Dewy Makeup Look Feel Natural
A natural glow looks like healthy skin, not a special effect. The best dewy makeup has a soft sheen that moves with your face. It lets the texture look like skin. When done well, radiant skin makeup looks calm, smooth, and easy in real life.


Natural vs. “glittery” glow: the key differences
Luminosity is a smooth, light-reflective finish that seems to come from within. It looks even up close and tends to blur, not spotlight, pores. In product terms, you’ll often see words like “radiant,” “luminous,” or “glow,” which usually point to a finer sheen.
Glitter or shimmer has visible particles that can flash when you move. It may look pretty in a mirror, but it can also catch on bumps, acne, or dry patches. If you can spot flecks on the skin, it’s shimmer, not the kind of fresh and glowing makeup that passes in daylight.
How light reflection creates a radiant makeup look
Natural radiance is basically smart light placement. Light hits the high points—cheekbones, the brow bone, and the bridge of the nose—then bounces back. That controlled reflection is what makes radiant skin makeup look believable instead of oily.
Aim for contrast, not an all-over shine. When everything reflects, the face can look flat or slick. With dewy makeup, the glow should sit where the sun would hit first, while other areas stay more refined.
Choosing glow placements that flatter real-life lighting
Lighting changes everything. Bathroom bulbs can make shimmer look louder, daylight can reveal texture, and a phone flash can turn extra shine into a hot spot. For fresh and glowing makeup that holds up, test your finish by turning your head and checking it from the side.
- Keep the center of the face (around the nose and inner cheeks) more controlled to avoid highlighting pores.
- Concentrate glow on the high planes: tops of cheekbones, a touch on the brow bone, and a light sweep on the bridge of the nose.
- If you have texture or active breakouts, place the sheen slightly higher on the cheekbone, not directly over raised areas.
- Blend edges well so the glow melts into skin and looks like radiant skin makeup in the car and outdoors.
Skin Prep Basics for Glowing Skin Makeup That Lasts
To get makeup that lasts, start with a calm, even base. You want your skin to be hydrated so makeup stays put. This is the secret to natural-looking, luminous finish makeup.
Prep is simple: cleanse, exfoliate gently, hydrate, moisturize, apply SPF, and wait a bit. Each step needs time to settle. This ensures smooth blending and prevents makeup from pilling.

Cleansing and gentle exfoliation for a smoother texture
Use a mild, low-foam cleanser that rinses well without residue. If your skin feels tight after washing, makeup won’t stay put.
For rough spots, use mild chemical exfoliants like lactic acid or PHA. They smooth your skin gently. Exfoliate 1-3 times a week, but skip it if your skin is sensitive.
Hydration layering for a fresh and glowing makeup base
Hydrate in thin layers. Start with a water-based essence or serum, then a moisturizer that locks it in. This keeps your makeup looking fresh and even.
Wait a bit between each layer for absorption. This helps your makeup stay in place, even in oily areas. It prevents separation around the nose and mouth.
SPF that won’t dull a luminous finish makeup
SPF is essential for glowing skin, but the wrong one can dull your makeup. Mineral sunscreens might look drier, while chemical ones feel better under makeup. Your sensitivity may affect your choice.
Apply SPF last, then wait a few minutes before primer or foundation. This ensures your makeup stays smooth and luminous. With the right timing, your makeup looks like a veil, not a layer.
How to Customize Dewy Makeup for Oily Skin
For oily skin, “dewy” doesn’t mean shiny. It’s controlled radiance that stays smooth. With the right steps, dewy makeup can look fresh and radiant.

Balancing hydration with oil control
Begin with lightweight hydration to avoid greasy patches. A gel moisturizer is great for this. If you have combination skin, use a richer cream on dry areas and a lighter cream on oily spots.
Choose dewy makeup that feels thin and flexible. Too much moisture can make pores and texture stand out.
Strategic powdering to keep a dewy finish to makeup
Powder is key if used wisely. Focus on creased areas like the nose and smile lines. Leave cheekbones and temples bare for a lifted look.
- Press powder in with a puff or sponge to set without dulling.
- Avoid sweeping back and forth, which can move your base and expose shine faster.
- For touch-ups, blot first, then add a whisper of powder only where needed.
Setting sprays that lock in a radiant skin makeup effect
Setting spray has two roles. A “melt” mist blends layers for a natural look. A long-wear spray keeps makeup in place. Using both keeps dewy makeup looking fresh.
Hold the bottle about an arm’s length away and use light, even mists. Let each layer dry before adding another. This keeps your makeup polished, even when oil appears.
How to Get Radiant Skin Makeup on Dry or Dehydrated Skin
Dry skin lacks oil, while dehydrated skin lacks water. Both can make makeup look bad. It’s important to know what your skin needs before you start.
If your face feels tight but looks shiny in spots, it’s dehydration. If it feels rough and stays matte, it’s dryness. This helps you choose the right makeup for glowing skin.

Begin with hydration that absorbs well. Use a hydrating serum, then a richer moisturizer. Add a small drop of facial oil to flaky areas. Let each layer settle for a few minutes to avoid sliding.
- For dehydration: focus on water-based hydration and a mist to ease tightness.
- For dryness: use a creamier moisturizer and a tiny amount of oil on flaky spots.
- For both: gently smooth flakes and avoid rubbing to prevent lifting dry patches.
Choose flexible, hydrating base formulas and apply in thin layers. A damp sponge helps blend makeup for a natural look.
Use powder sparingly. Even a light dusting can dull the glow. Apply powder only where you truly crease. If makeup looks tight, spritz a hydrating mist and press again without dragging.
For lasting comfort, focus on hydration under your makeup. This keeps your makeup even and radiant without shifting.
Primers and Base Grips That Boost Luminosity Cosmetics
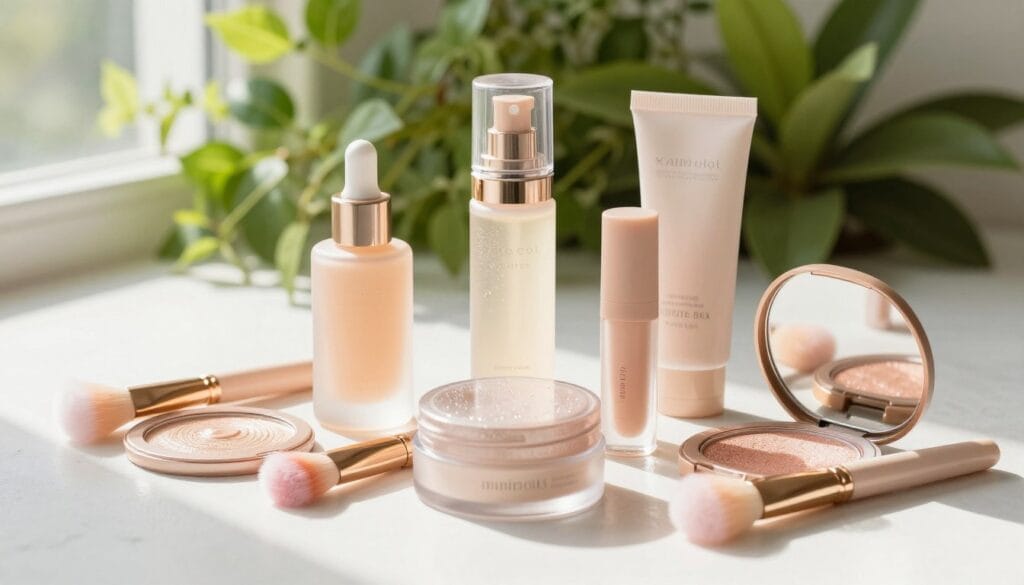
A primer is like a secret helper in your makeup routine. It makes your skin smooth, stops makeup from sliding, and helps it last longer. This way, your foundation looks even and bright.
Hydrating primers vs. illuminating primers
Hydrating primers make your skin feel soft and look smooth. They’re great if your skin is dry or if makeup doesn’t stay put in certain areas.
Illuminating primers give a soft glow. They’re perfect for normal skin that needs a bit of brightness or when you want a subtle shine.
- Dry or dehydrated: start with hydration, then add shine.
- Dull or normal: use illumination for a soft glow.
Pore-blurring options that look skin-like
Pore-blurring primers can make your skin look even. They use silicones to create a smooth surface. But using too much can make your skin look too matte.
Apply blur only where needed, like the T-zone. Leave other areas lightly primed or bare to keep your makeup dewy.
Mixing drops: how to add glow without separation
When using glow drops, start with a small amount. Mix one drop into your foundation for a natural glow. Or, tap a tiny amount on high points for extra shine.
Too much oil or mismatched products can cause problems. Make sure your SPF and primer are compatible to avoid separation, like around the chin and smile lines.
- Let SPF set before applying primer.
- Match textures: water-based with water-based, silicone with silicone.
- Use glow drops in small amounts to avoid texture emphasis.
Choosing a Luminous Foundation for Every Skin Type
The right foundation makes your skin look fresh and natural. It’s as important as your skincare routine. A good match ensures you look radiant in any light.
What “luminous” really means on the label
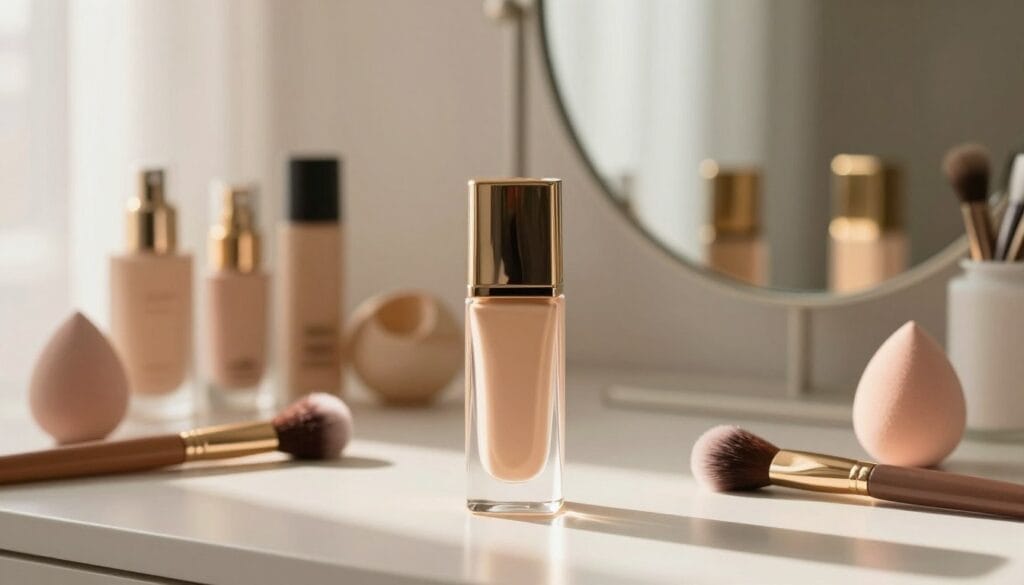
Labels like luminous, radiant, dewy, and skin finish hint at different formulas. Some have light-reflecting pigments for a soft glow. Others let your skin’s natural shine through.
If you get oily, look for foundations that say “radiant” and “long-wear”. For dry skin, “hydrating luminous” is a good sign. Mature skin benefits from a comfortable, not sparkly, foundation.
Coverage levels that keep skin looking like skin
Light-to-medium coverage looks the most natural. Start with thin layers and build up only where needed. Use concealer for spots, not more foundation.
- Sheer layer first: smooths tone without hiding skin.
- Second layer only if needed: tap on, don’t swipe.
- Finish control: mix with moisturizer in winter, switch primer in summer, and powder only the center of the face.
This way, your makeup stays light and radiant.
Shade matching tips for a natural, radiant makeup look
When skin glows, color mismatch shows up fast. Test shades in daylight and check from the side. Match closer to the chest for a seamless look.
- Pick your undertone first (cool, warm, neutral, or olive), then fine-tune depth.
- Give it 10–15 minutes to watch for oxidation and darkening.
- Blend down the jaw and pause—if the edge disappears, you’re close.
With the right shade, your foundation looks intentional. Your radiant makeup stays believable from every angle.
Concealer Techniques That Keep the Glow (Not the Cake)
Concealer can either protect your glow or pile on texture. The trick is to give it two clear jobs. Keep the rest of your base light, so your radiant skin makeup looks like skin.
Using less product in smarter spots keeps your makeup smooth. This way, your glowing makeup looks fresh in daylight, not heavy up close.
Pinpoint concealing vs. brightening under-eyes
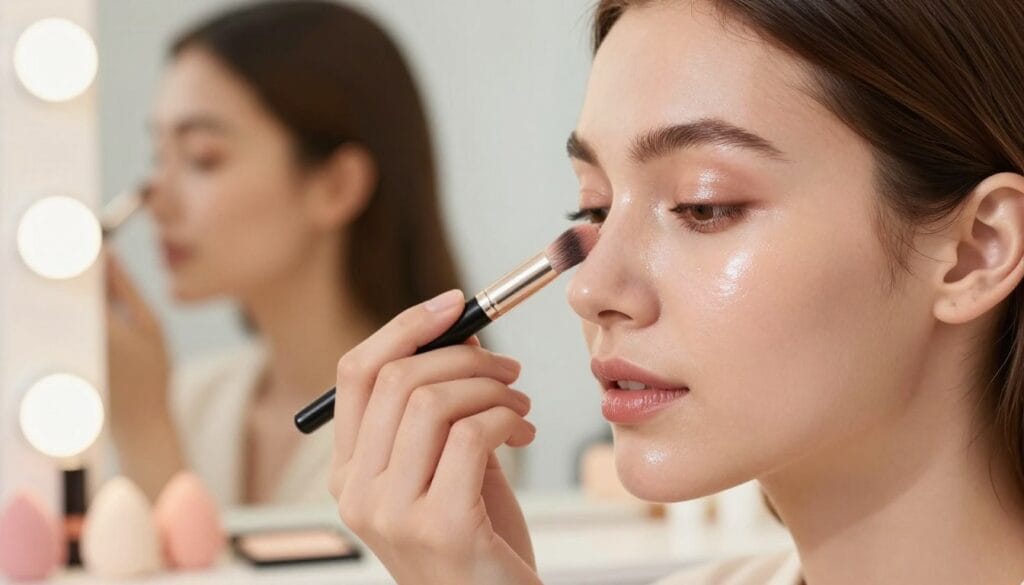
Pinpoint concealing is for redness, blemishes, and little marks. Use a tiny dot, then tap just the edges so coverage stays where you need it for radiant skin makeup.
Brightening is for under-eye shadows, not the whole under-eye area. Heavy concealer creases because it sits in lines and dries as you blink, which can dull a glowing makeup look.
Try a thinner layer placed slightly lower than the lash line, right where discoloration looks deepest. Then tap upward to blend, keeping the inner corner soft so the luminous finish of the makeup doesn’t crack.
Hydrating concealers for a luminous finish in makeup
For a flexible, skin-like result, look for hydrating concealers that feel comfortable and move with your face. Formulas with fewer drying alcohols and a satin, pliable finish tend to melt into radiant skin makeup instead of sitting on top.
If you’re using a luminous base, match it with a concealer that won’t turn matte and stiff. That balance helps your glowing makeup look stay even from morning to late afternoon.
Blending tools that preserve a glowing makeup look
- Fingers: the warmth helps the product melt in, ideal for under-eyes and around the nose.
- Damp sponge: press and roll to diffuse edges without wiping off coverage, keeping luminous finish makeup intact.
- Small brush: best for pinpoint work; place precisely, then tap around the spot to blend.
If you set, do it with a tiny amount of micro-powder only where creasing happens. Leave the rest alone so your radiant skin makeup stays luminous and your glowing makeup look keeps its soft shine.
How to Apply Natural Luminous Makeup Without Heavy Layers
The secret to an expensive glow is simple: aim for evenness, not perfection. When a little real skin shows, your makeup stays fresh and not flat.
This approach also prevents makeup from becoming too thick and slippery later. You’re creating a finish that moves with you and looks like real skin.

Sheer-to-buildable base application methods
Focus on areas that need coverage most: the center of your face, around the nose, and over uneven tone. Start with a small amount and blend outward until it fades.
If you need more, add it in tiny layers. This method keeps your makeup smooth in daylight and prevents it from separating.
- Use thin dots of foundation, then press in with a damp sponge or clean fingers.
- Sheer out the perimeter of your face so it stays light and believable.
- Pause after each layer to check how it looks in natural light.
Where to spot-correct and where to let skin show
Spot-correct redness around the nostrils, the chin, and any discoloration. Use concealer tightly around the area, then tap the edges until they blend in.
Let freckles, natural contours, and healthy texture show. This approach keeps your makeup from looking like a mask.
Creating a dimension with thin, targeted layers
For shape and warmth, use cream bronzer and blush instead of more foundation. Keep high points luminous and low points softly sculpted for depth.
- Bronzer: sweep lightly under cheekbones and along the temples.
- Blush: tap high on the cheeks and blend back toward the hairline.
- Skip glow on oily zones so your radiant makeup looks polished, not sweaty.
Avoid common mistakes: glow on every inch of the face, too much powder, and too many layers. A lighter hand keeps your makeup stable and bright.
Cream Blush and Bronzer for a Dewy Makeup Finish
Cream blush and bronzer blend into your foundation, creating a natural look. This blend is key to a dewy makeup finish. It gives you soft edges and a natural glow.
To add a fresh lift, apply blush higher than usual. Place it on the cheekbone and sweep it back toward the temple. This trick makes cheeks look bright and natural.
If you have visible pores, use richer colors on the outer cheek. This helps avoid drawing attention to pores.
When using bronzer, aim for a sun-kissed look, not stripes. Lightly tap it on the forehead, cheeks, and nose. This adds warmth without overpowering the glow.
If you have breakouts or rough skin, use creams carefully. Press them in with your fingers or a dense brush. This way, you maintain a radiant look while protecting sensitive areas.
- Apply creams first, then pause and check the finish in natural light.
- If you need more wear, add a whisper of matching powder blush or bronzer on top.
- Keep layers thin so the dewy makeup finish stays smooth, not heavy.
Highlighter Placement for a Soft, Radiant Makeup Look
A soft highlight should look like healthy skin, not a shiny stripe. Aim for a smooth sheen that catches light when you move. If it’s obvious straight on, it’s usually too much.

Before choosing where to place a highlighter, think about what you want to lift or balance. The most flattering glow points are small and intentional. This helps your luminous finish makeup look polished in real life.
Best glow zones for different face shapes
- Round: tap highlight slightly higher on the cheekbones and a bit outward toward the temple to create lift.
- Long: keep the glow more centered on the tops of the cheeks; a long stripe can make the face look longer.
- Square: focus on the upper cheekbones and keep it narrow to soften angles without pulling light toward the jaw.
- Heart: refine the center glow and softly lift the cheeks, so the look stays balanced from forehead to chin.
Powder vs. cream highlighter for dewy makeup
Cream formulas tend to melt in, making dewy makeup look more skin-like. Powder highlighter can be easier to control and can last longer, even in oily areas.
If texture is a concern, start with a thin cream layer and stop there. If you need extra wear, add a tiny touch of finely milled powder only where you want more reflection. This way, your luminous finish makeup stays fresh.
How to avoid emphasising texture
Highlighter can spotlight enlarged pores, active breakouts, and fine lines you’d prefer to blur. Keep the glow off those areas, and place it where the skin is smoother, like the high point of the cheekbone.
Use a small brush or a tapping finger motion instead of sweeping. Then do a real-life check: step back and turn your face toward the side light. If you notice sparkle particles before you see a soft glow, blend more or scale back to keep your radiant makeup look natural.
Eye Makeup That Complements a Fresh and Glowing Makeup Vibe
When your skin looks fresh and glowing, your eye makeup should be light and clean. It should add a soft definition that highlights your features. This way, your whole face looks polished and radiant.
Prep is key to keeping everything crisp. Apply a thin eye primer or a light veil of translucent powder over your lids. This prevents creasing and keeps your makeup looking neat all day.
Light-reflective lids without fallout
Opt for satin creams or finely milled shimmer instead of chunky glitter. They reflect light subtly and blend well with your glowing skin.
- Tap, don’t swipe: press shimmer on with a fingertip or flat brush to reduce fallout.
- Apply lid shimmer after foundation and concealer, so you can clean up edges fast.
- If you love extra shine, use a thin layer of eyeshadow primer as a grip before shimmer.
Soft liner and mascara choices for a natural finish
For a defined eye that fits a radiant makeup look, keep lines close to the lashes. Use a pencil to tightline, or smudge a soft brown or charcoal shade along the upper lash line for a blurred edge.
With mascara, aim for lift and separation over heavy volume. A clean, fluttery lash keeps the eye open and bright, without competing with your skin’s glow.
Brow grooming to frame a glowing skin makeup look
Groomed brows make dewy skin look purposeful, not unfinished. Brush hairs up and out, then fill only where you see gaps using light, hairlike strokes.
Set with a clear or tinted brow gel for flexible hold. The result frames your features and supports the fresh and glowing makeup vibe while keeping the overall effect soft and touchable.
Lip Options That Match Dewy Finish Makeup
When your skin looks fresh, your lips should feel just as alive. The easiest match for dewy finish makeup is a lip that reflects a little light. This makes your face look smooth and natural.

If you love a matte lip, you can wear it, but it may feel separate from the glow. To keep it cohesive, soften the edges and keep the rest of your makeup light. With the right balance, dewy makeup products on the cheeks and a calmer lip can look intentional.
- Balms for a sheer tint that melts into hydrated skin
- Satin lipsticks for polish without a dry finish
- Glosses for that juicy center shine that boosts a radiant makeup look
- Lip oils for slip and comfort when you want shine without stickiness
For shades, aim for colors that echo natural warmth: rosy nudes, soft berries, warm peaches, and muted terracottas. These tones tend to read fresh next to dewy-finish makeup. Deeper shades can work, too, if you keep eyes and cheeks softly defined and let the lip be the focus.
To make it last without drying out, use a simple layering method that keeps the dimension. Shape line, add a thin layer of lipstick, then tap balm or gloss just at the center. This keeps the mouth plush, and it pairs well with dewy makeup products everywhere else.
- Prep with a gentle conditioner and blot once
- Trace and lightly fill with liner to prevent feathering
- Add a thin lipstick layer, then press your lips together
- Finish with balm or gloss in the middle for a radiant makeup look
If you’re prone to flakes, skip harsh scrubs right before color, as they can leave lips irritated and uneven. A calm, hydrated base makes any lip finish look smoother. It helps dewy finish makeup stay believable up close.
Best Dewey Makeup Products and Tools to Keep on Hand
For a dewy look, keep your makeup simple. Choose a few reliable products that you can layer easily. This way, you’ll stay fresh and polished all day.

Complexion essentials for luminosity cosmetics
Begin with a skin tint or luminous foundation. Then, use concealer only where needed. Add cream blush or bronzer, a subtle highlighter, and a setting mist to complete your look. These basics help build a natural glow in thin layers.
- Base: skin tint or luminous foundation for an even, skin-like veil
- Targeted coverage: a concealer that blends without grabbing
- Color and warmth: cream blush and cream bronzer for a lived-in flush
- Light: a soft highlighter that doesn’t look icy or gritty
- Finish: a hydrating setting mist to keep radiant skin makeup from going flat
Brushes vs. sponges vs. fingers for a luminous finish
Your tools greatly affect your look. Brushes offer precision, sponges blend product into skin, and fingers warm creams for a natural finish. Clean tools are key to avoiding a bumpy glow.
- Brushes: best for concealer placement, bronzer shaping, and light powder only where needed
- Sponges: great for bouncing in base makeup to keep edges seamless and luminous
- Fingers: ideal for cream blush and highlighter when you want a natural, skin-warmed finish
On-the-go touch-ups for a radiant skin makeup look
For touch-ups, aim to refresh, not rebuild. Blot first, then add a trace of powder where needed. Finish with mist to bring back slip. A cream blush stick can revive your cheeks in seconds, keeping your dewy makeup fresh.
- Blotting papers for the T-zone
- A small pressed powder for strategic spots only
- A travel-size mist to rehydrate and smooth
- A cream blush stick for quick color
Avoid stacking thick powder or heavy balm over textured areas. This can cling, separate, and dull your glow, which is a problem as the day warms up.
Conclusion
Natural luminous makeup is all about a glow formula you can trust. It starts with solid skin prep and choosing the right layers. Brands like Clinique and NARS are often associated with products that help achieve that radiant look. Use a light hand to avoid looking too done.
Begin with hydration that matches your skin type. Then, add thin layers to keep your skin looking natural. Use correction wisely and place shine carefully for a fresh look.
If you love dewy makeup but are worried about oil, there’s a way to balance it. Use a selective powder and set in creases to control shine. For dry skin, focus on hydration and use powder sparingly. This way, your makeup stays smooth and radiant.
For a routine you can follow, keep it simple. Prep your skin, apply a sheer base, and use pinpoint concealer. Add cream color, soft highlight, and set with care. Refresh as needed, but avoid heavy reapplication.
This approach keeps your makeup looking natural from morning to night. It also makes your dewy makeup look flexible, so you can adjust without adding too much.
Remember, glowing skin makeup is about looking like your best self, not perfect. When your layers and glow are intentional, you look like you’re having a great day. It’s all about finding that natural, radiant glow.